
Figure 1: Image registration applet.
Open your Internet Explorer and go to the URL: http://isda.ncsa.uiuc.edu/MedVolume/applet.html and select Application from the menu on the left. In the left lower corner of your browser, you should see the following sequence of messages:
The browser will display two images to be registered.
Figure 1: Image registration applet.
By default, the loaded images are from slide 24 (left image panel) and slide 25 (right image panel). If you wish, then by clicking on the drop down menu with image names you might select any other image for registration from the collection of slides (s24-s33) that should form a 3D volume. Selected images will be compressed at NCSA site, transferred to your site, decompressed and displayed in the image panels.
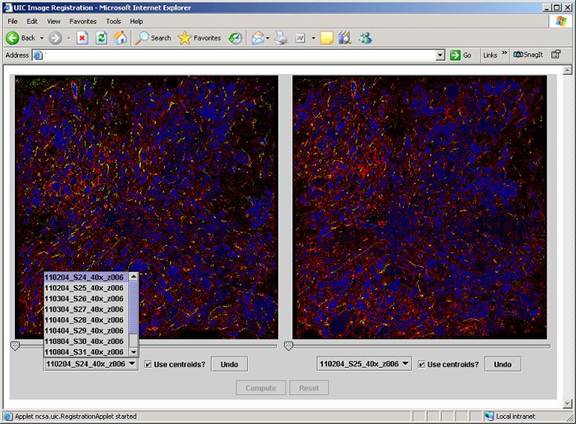
Figure 2: Image selection menu.
Select at least three pairs of matching points/segments. If an image panel is in the point selection mode then the left mouse click will define the pixel location to be used for registration. If an image panel is in the segment selection mode then the left mouse click will be replaced with the centroid location of the segment that contains the mouse click location.
Use the check box below each image to define a point or segment selection mode.
Use the image manipulation functionality described in the next section.
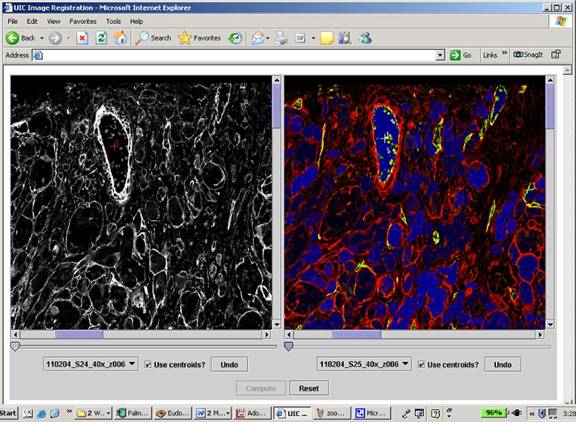
Figure 3: Selection of registration points using the centroid feature approach.
Press the button ìComputeî to compute affine transformation parameters.
A new Java window labeled "Executing Job" will appear and contains information about the compute job. If you wish to terminate the execution, then press the button "Abort".
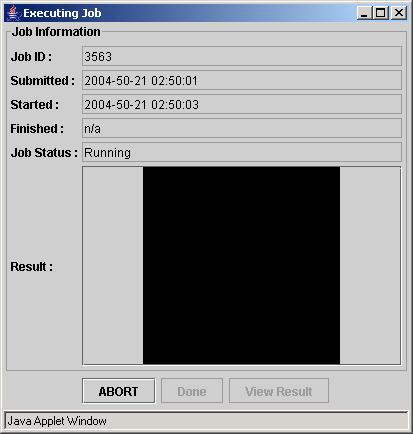
Figure 4: Job execution window (job is running).
In the Java window labeled as "Executing Job", one can monitor the progress of the executed job. After the job is finished, the button "View Results" will become active. Press the button "View Result" to visualize the transformed image (originally in the right image panel) to the coordinate system of the image in the left image panel.
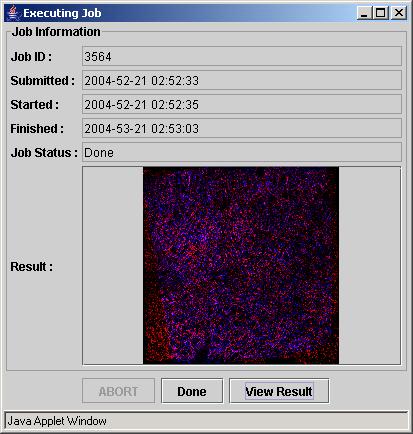
Figure 5: Job execution window after pressing the button
"View Result".
The visualization will contain a seven band image that was sub-sampled in order to decrease the file size. The seven band image contains the following bands:
By default, band 0 and band 3 are displayed. Other bands can be viewed by right mouse clicking on the resulting image and using the "Select bands" menu. Inspect the accuracy of registration and click the button "Done".
If the registration accuracy is satisfactory to the medical collaborators then they should record the job ID number displayed in the top section of the screen. This will allow NCSA to retrieve the points associated with the correct registration session and complete the 3D volume reconstruction.
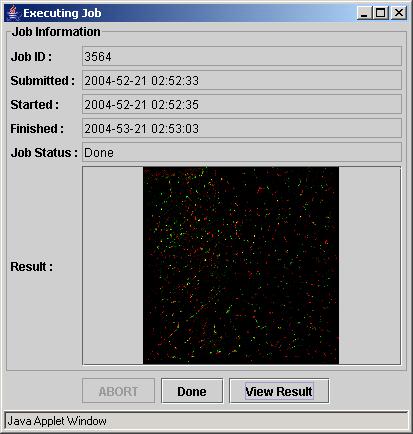
Figure 6: Results of registration after choosing green
bands from the two input images.
Currently, it is required to align depth adjacent slides because it is assumed by the final 3D volume reconstruction algorithm. However, the registration tool allows registering an arbitrary pair of images.
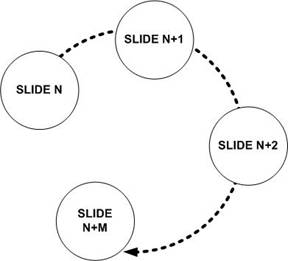
Figure 8: Required order of slide (image) registration
for 3D volume reconstruction.
Image manipulation and navigation can be performed with a computer mouse. In order to change zoom level, select image sub-area, or select displayed image bands, one should right mouse button click over an image panel. This operation will show the menu shown in Figure 8. The options are explained next.
This option change digital resolution of an image. The option "fit" will automatically rescale an image to fit the image panel size. The option "custom" lets a user define the scaling factor either as a multiplicative factor or as a percentage (by appending % to the number) of the original image size. For example using the number 2, or 200% will result in an image that is twice the size of the original.
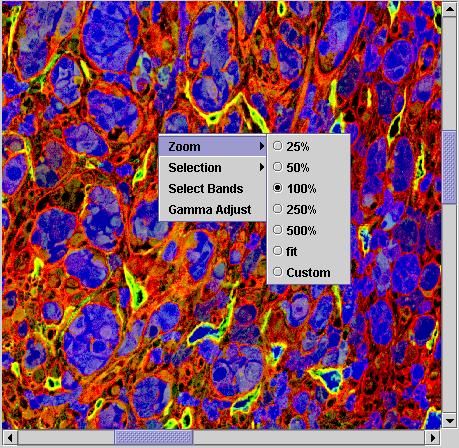
Figure 8: Zoom selection menu.
If the spatial area of a displayed image is larger than the allocated window then the image will appear in a scroll panel. The navigation is enabled with sliding horizontal and vertical scroll bars to view any area of interest.
This option enables to select a sub-area of interest. An area is selected by left mouse clicking and dragging to establish a rectangular window. With the right mouse button, choose "Selection->Show Selection" to display the area of interest. You might use the zoom option to increase the viewed resolution. The full image can be retrieved by choosing ìSelection->Full Imageî (see Figure 9). The sub-area selections can be disabled by un-checking the box "Selection->Allow Selection".
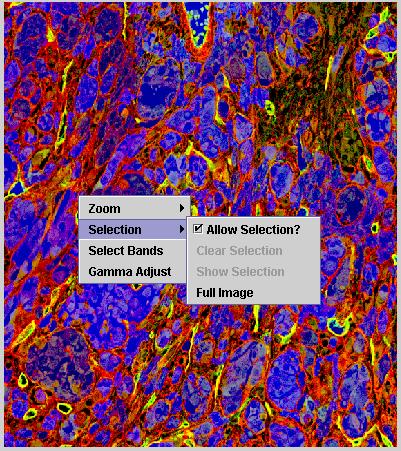
Figure 9:
Sub-area selection menu.
The dialog "Select Bands" shown in Figure 10 appears after right mouse button click and selection of the "Select Bands" option. The dialog slider bars and edit boxes provide a way to choose which input image band will be displayed in which color band (red, green or blue color bands). If a grayscale mode is preferred then the check box ìUse Grayscaleî should be checked and the slider bar below it defines the displayed band. The button "Apply" is for executing the desired band assignment. The preview window above the band assignment entries is designed to show a preview of the resulting image.
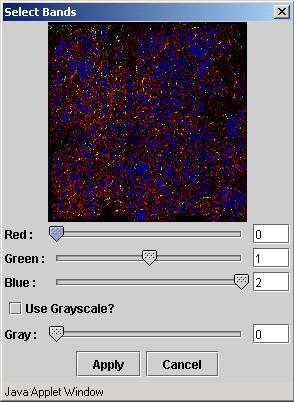
Figure 10:
Select bands dialog.
The dialog "Select Gamma" shown in Figure 11 appears after right mouse button click and selection of the "Gamma" option. The dialog slider bar and the edit box are for setting the image brightness (gamma factor).
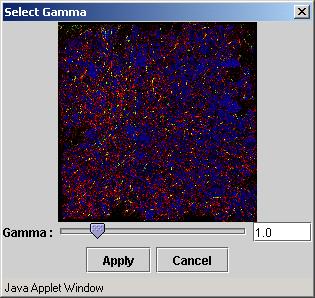
Figure 11:
The "Select Gamma" dialog for adjusting image brightness.
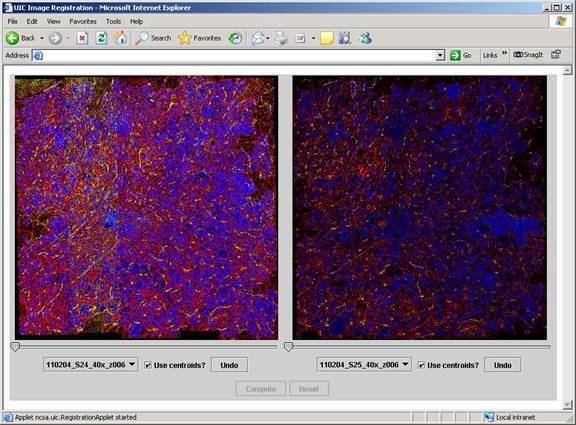
Figure 12: Images after applying the gamma
adjustment (left image - gamma equals to 3, and right image - gamma is equal to
1).