Strain
Analysis Tool
Main Classes:
NEESFrame -> main window (SAT)
Object3DFrame -> Krypton window (SAT-KDA)
StressImageFrame -> Stress Photonics window (SAT-SPDA)
1 Description:
The SAT software supports
visualization and data fusion tasks with data sets acquired from Krypton and
Stress Photonics instruments during structural engineering analyses.
Based on different requirements for processing data from the two instruments,
the SAT software consists of two tools for handling raw data from each instrument
(denoted SAT-KDA and SAT-SPDA) and one tool (main SAT frame) for fusing preprocessed
data sets from both systems.
The Krypton system [http://www.krypton.be] measures three-dimensional coordinates of LED targets attached to the surface of a test structure. By attaching a grid of LED targets on the test specimen, one can measure temporal displacements of the LED targets over an area of interest as a function of a structural load. The Stress Photonics System [http://www.stressphotonics.com] measures stress values over a dense set of grid locations using either a photoelastic sheet or a special coating attached to a test structure. These two systems represent non-contact instruments that are part of the structural engineering research.
The SAT software was developed by NCSA to support (a) the Network for Earthquake Engineering Simulation (NEES) MUST SIM project and (b) the Multi-Site Online Simulation Test (MOST). More information about the NEES project can be found at http:// www.nees.org. The MOST experiment was conducted by the department of Civil and Environmental Engineering (CEE) and NCSA at the University of Illinois in Urbana-Champaign, and the University of Colorado to demonstrate another component of the NEES project called the NEESgrid [http://neesgrid.org].
Note: SAT is
specifically designed and optimized for the Network for Earthquake
Engineering Simulation Research.
2 Functionality Overwiev:
SAT software consists of SAT-KDA, SAT-SPDA and SAT-MainFrame tools and provides the following main functionalities:
- File Input/Output
- Visualization of raw and processed data
- Data analysis and fusion
2.1 SAT-KDA Tool
SAT-KDA tool supports file I/O, visualization and analysis of data generated by Krypton system. The main features of the SAT-KDA tool are:
- File Input/Output
· Load single file or multiple files by appending to an existing data.
· Load or append averaged coordinates along temporal sequences.
· Export current view of the window to an image format (tiff).
· Save directly a raster image of the interpolated point measurements.
- Visualization of raw and processed data
· Visualize 3D objects projected into a two-dimensional x-y plane.
· Visualize x-y coordinates of the objects.
· Visualize displacement changes along x and y direction with respect to an initial step.
· Visualize strain values between adjacent objects with respect to the initial step.
· Visualize directional results of finite element analysis (Horizontal, vertical, shear, and maximum shear)
· Visualize meshes with pseudo color with respect to strain values.
· Adjust strain ranges for pseudo coloring.
· Zoom (unlimited) and pan objects in display window.
· Visualize exaggerated displacement changes with respect to the initial step.
· Display animation of object motions.
- Data analysis and fusion
· Detect automatically grid geometry
· Customize local coordinate systems with user-defined parameters.
· Create multi-banded raster images of finite element analysis with advanced interpolation method (B-spline based interpolation).
2.2
SAT-SPDA Tool
SAT-SPDA tool supports file I/O, visualization and analysis of data generated by Stress Photonics system. The main features of SAT-SPDA are:
- File Input/Output
· Load raw data generated by Stress Photonic System.
· Load the exported excel format.
· Input/Output user selected templates
- Visualization of raw and processed data
· Create multi-band image with finite element models.
- Data analysis and fusion
· Detect automatically objects (Krypton LED targets).
· Detect grid of objects.
· Adjust threshold for object detection
2.3 SAT-MainFrame Tool
SAT-MainFrame tool supports file I/O, visualization and analysis of data generated by SAT-KDA and SAT-SPDA software tools. The main features of SAT-MainFrame are:
- File Input/Output
· Load processed data files (.img.hdr)
· Load and Save transformation parameters
- Visualization of raw and processed data
· Select individual bands for visual window
· Adjust pseudo color range
- Data analysis and fusion
· Interactively select control points for registration
· Register two data sets using forward and backward affine transformation
· Data Analyzer
o Select individual bands for data comparison
o Extract values and locations from registered images
3 Expected Experimental Setup
3.1 Krypton System
Krypton's RODYM Dynamic Measurement Machine is
capable of measuring three-dimensional motions of light emitting diode markers
(8 grams, 8 mm diameter). Regardless of the channel
or port numbers that connect LED targets, SAT is capable of automatically
detecting LED target geometry. For a meaningful structural analysis in NEES
experiment, SAT-KDA tool detects a grid of LED targets. Figure 1(a) shows
a sample setup of LED targets. Note that the LED targets must be arranged
in a grid pattern aligned with the row/column coordinate system. The software
can tolerate 10% error of the LED
grid spacing for successful grid detection.


Figure 1: Examples of LED target spatial arrangements: (a) complete grid and (b) partially complete grid.
For more flexible target measurements, some partial grid configuration is allowed. Figure 1(b) shows an example of partial grid of LED targets.
3.2 Stress Photonics System
In the case of the
Stress Photonics system, our software assumes that the measurements are coming
from a region with Krypton LED targets. This type of experimental
instrumentation setup is necessary for registering Krypton and Stress Photonics
measurements by identifying spatial location of LED targets in both
measurements. We have observed better data quality of Stress Photonics
measurements with the use of photoelastic sheets attached to the surface of a
structure.
4
Running Strain Analysis Tools
This section describes how to process data acquired by Krypton and Stress Photonics systems during a typical NEES MUST SIM experiment. It is assumed that all experimental setup requirements described in Section 3 have been satisfied and the software has been installed properly. One should execute the following steps in order to visualize and/or analyze any acquired data sets from the aforementioned instruments.
Running from raw data
1. Launch SATMainFrame by clicking NEES-SATW.exe
2. From menu “Tools”-“Open” select “Krypton” to launch the SAT-KDA tool
3. Process data generated by Krypton system according to the Section 4.1
4. Create processed data by clicking “Create Raster(FEA)” in SAT-KDA menu
5. From menu “Tools”-“Open” select “Stress Photonics” to launch the SAT-SPDA tool
6. Processed data will be automatically created when loading a raw data
7. Process data generated by Stress Photonics system according to the Section 4.2
8. After completing steps 4 and 6, processed data will be automatically stored in the SAT tool.
9. Perform data fusion according to the Section 4.3.
Running from processed
data
1. Launch SATMainFrame by clicking NEES-SATW.exe
2. Load processed images into SATMainFrame by selecting from menu File/Open Raster Image
3. Perform data fusion according to the Section Z.
4.1
Krypton Data Analyzer
(SAT-KDA)
SAT-KDA consists of two panels (control and option panels) and one visualization window. By using the control panel, one can perform data I/O, property setup, and data conversion (to interpolated raster image). The option panel enables users to choose the display and finite element model for the visualization. The main visualization window displays the image in a time frame with user defined adjustable exaggeration by zooming and panning. In addition, the sequence of temporal samples can be visualized as an animation. Figure 7 shows the Krypton Data Analyzer.

Figure 2:
Krypton Data Analyzer
4.1.1
Input Data
Formats
4.1.1.1
KRP Data Formats
A standard data file format for the SAT-KDA is a tab-delimited ASCII file. Two types of data input modes are available. First, files with the suffix .krp can be loaded directly from a command line. The .krp file format is a tab-delimited format where a column represents x, y, and z coordinate values for 3D objects in different spatial locations, and a row represents a loading step at multiple temporal increments. Figure 8 shows an example of a krp file.

Figure 3: An example of the .krp data file format.
Second, the SAT-KDA can load files with the suffix .kr2. The Krypton DMM software that comes with the system creates these files directly and a user can export the data in a text format from the Krypton data viewer. For more information about the Krypton DMM software, see the Krypton manual.
4.1.1.2
Input Header Format
In order to load Krypton data correctly into the SAT-KDA tool, a header file is required to set mapping and flipping parameters. Header files are named as .kt extensions. Figure 9 shows an example of a header file. The header file contains the file date, data file name, data format, axis flipping parameters, and mapping parameters.

Figure 4. An example of a kt header format
The entry “Axis Flip” defines local coordinate systems. The values of the Axis Flip entry can be “0” or “1” and represent no change “0” or change “1” of the axis positive direction. Three digits of the entry correspond to definitions of x-, y-, and z-axes. Note that the order of tags corresponds to x, y, and z data positions in the input data file. The coordinate mapping customizes local mapping of x, y, and x-axes with respect to the sequence appeared in an input file.
4.1.2
Loading and Saving Files in SAT-KDA
SAT-KDA displays three-dimensional data acquired by Krypton System (http://www.krypton.be). In general, the SAT-KDA can visualize similar types of vector data conforming to the input file format. One can export any visual display from SAT-KDA (visualization window) in a standard tiff file format.
SAT-KDA software supports multiple advanced loading methods.

Figure 5: Control and Option Panels
Figure 10 shows several file input/output and display options as described below:
- Load a file: loads a temporal sequence of a set of 3D locations (kt header).
- Load average: loads averaged values along a temporal sequence, which results in one step of averaged measurement. The method is useful when multiple steps of information are generated at one loading step. By calculating mean values, we can expect less noisy input (kt header).
- Add a file: appends data generated by next loading steps. When the Krypton system generates multiple files in different loading conditions, newly generated data can be added in previously generated data sets by this method (kt header).
- Add average: appends averaged data from one loading step. It is a combination of methods of 2 and 3 (kt header).
- Load sequence (krp): loads multiple krp-type files at once. This method is useful for post processing.
- Save as: exports current screenshot of visualization window into a tiff image.
4.1.3
Data Visualization in SAT-KDA
According to the options shown in Figure 10, the following features are available for data visualization:
· Min and Max Edit Boxes for specifying the minimum and maximum values of strain visualization using pseudo-colored lines.
· Color Bar button displays a color index with respect to strain values.
·
Start Animation button starts animation from the
initial frame to final frame.
·
Create Raster(FEA) button creates an
interpolated denser raster image from the vector data of the current loading
step using a B-spline model. The generated image consists of four bands
corresponding to interpolated horizontal strain, vertical strain, shear strain,
and maximum shear strain.
·
Save Raster(FEA) button saves the interpolated
multi-band raster image.
·
The option panel enables setting on and off some
display features, that include point display, coordinates display, displacement
display, strain display, and pseudo colored line display.
·
The left scroll bar in the main visualization window
(see Figure 7) is for selecting a temporal frame of the viewed data set from a
stack of time stamped frames.
·
The right scroll bar in the main visualization window
(see Figure 7) is for setting an exaggeration factor of the current temporal frame
visualization.
4.2 Stress Photonics Data Analyzer (SAT-SPDA)
SAT-SPDA tool is a data loader and visualization tool for the stress data created by Stress Photonic System. The Stress Photonic System generates multiple banded outputs where each band contains different values. For more details about the interpretation of measurements, please, consult the manufacturer or its web site at [http://www.stressphotonics.com].

Figure 6: Stress Photonic Data Analyzer
The main purpose of the SAT-SPDA is to load any acquired data by Stress Photonics system and search automatically for common control points, e.g., the Krypton LED targets, needed for registration purposes.
Note: the template searching functionality only works for the data set that contains the Krypton targets. For example, the template search for LED targets in ABAQUS predictions since the LED targets are not present in synthetic data.
4.2.1
Input Data
SAT-SPDA can directly load the file created by Stress Photonic system (dt1), the file created by ABAQUS (dt2), and excel exported data format (str). The ABAQUS generated data must comply with the predefined format that is identical to the file format of text exported Stress Photonics data. The dt2 file format is a simple ASCII file with image dimension followed by raw values of pixels.
4.2.2
Template Selection
A template can be selected by user interface by selecting a rectangular region in the visualization window. When a user selects a region, the template widow will pop up to show the zoomed image of the feature. For the NEES experiments, the template is the krypton LED. The selected template can be stored or loaded using Template panel in Figure 11.
4.2.3
Template Search
With carefully selected template, the SAT-SPDA can perform automatic feature detection in current visualization. A user can specify the number of targets to search. Although SAT-SPDA sets an optimal threshold value for the feature detection automatically, a user can manually specify the threshold value for more efficient and robust feature detection. Figure 12 shows an example of searching Krypton LED targets using a user-defined LED template. While a red square denotes the best match, green squares show all other recognized matches.

Figure 7: Template Search
4.3 SATMain Frame
The main frame in can launch both SAT-KDA and SAT-SPDA. In addition, it can process post-processed data for data fusion.


Figure 8: Main Frame
The file format used for SAT is a float-based data (img). This image can be created from both SAT-KDA and SAT-SPDA. By loading the files, users can directly perform data fusion without re-processing raw data using SAT-KDA or SAT-SPDA.
4.3.1
Registration
Data fusion work is divided into two tasks; data registration and data comparison. Data registration can be performed to match two data sets into a geometrically conformal format. Since the processed data contains multiple entities, such as horizontal strain, vertical strain, shear strain, and maximum shear strains, the tool enables users to select an individual band for feature selection for registration as shown in .

Figure 9: Band Selection
After selecting each band from two data sets, the images can be registered by manually picking a few corresponding points in two different images. In , manually selected points are displayed in the registration window. After picking three corresponding features in each image, the transformation of the image in the left panel is performed to match to the image in the right panel. For more precise feature selection, a user can see a region through a magnifier by clicking right-mouse button. The Resulting image is shown in . The transformed image can be again stored in local drive with the “img” format.

Figure 10:
Registration
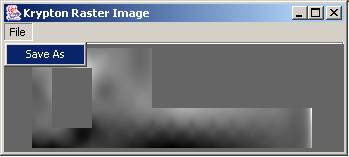
Figure 11: Transformed image
4.3.2
Image Analyzer
After the registration, as a part of the data fusion, the image analyzer can perform data comparison as shown in Figure 17. This tool lets users directly observe the data values at a selected location in two images. The pseudo color ranges can also be adjustable using the provided color bar panel.

Figure 12: Image Analyzer