Class IsTexture
The class IsTexture provides a tool for calculating local image extrema densities,
and finding texture regions whose extrema densities are within a given density range.
This tool is based on the paper:
Karu Kalle, Jain Anil K., Bolle Ruud M. "Is there any texture in the image?", Pattern Recognition, Vol. 29, No. 9, pp. 1437 1446, 1996.
Setup:
It is assumed that an image file has been loaded in the main window and an IsTexture dialog has been invoked
from the ImLabels menu of the main window.
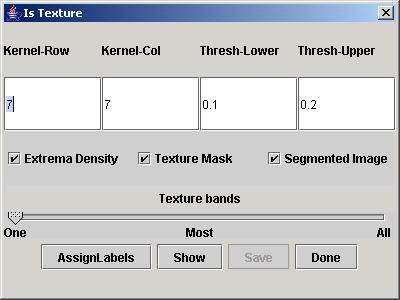
IsTexture dialog.
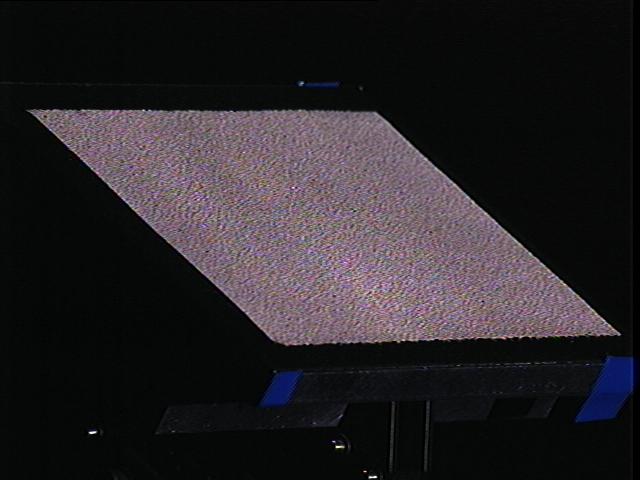
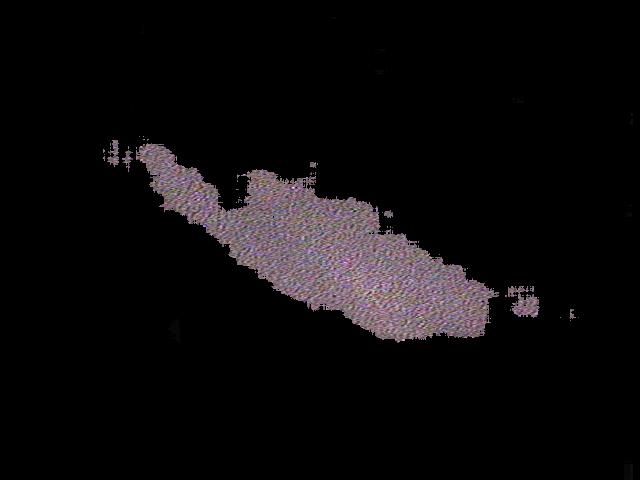
An example original image of sandpaper from CURET database.
Extrema densities image for the sandpaper above, with lighter colors representing higher density.
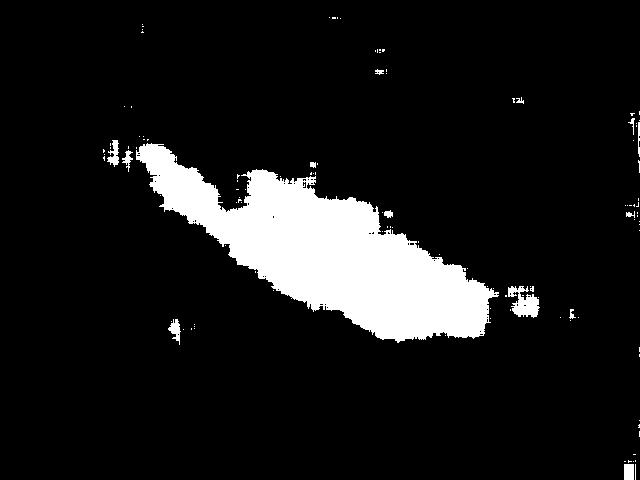
Binary mask of the density image, with white pixels being within threshold range and black being outside.
Original image overlayed with binary mask.
USER INSTRUCTIONS
1) Specify the filter kernel size in pixels by entering row and column kernel dimensions
in the edit boxes labeled as Kernel-Row and Kernel-Col. These values
of the kernel will used for finding extrema density.
2) Specify the upper and lower threshold values of the local extrema densities
in order to characterize texture or non-texture pixels using extrema densities.
Pixels with densities within the threshold bounds will be labeled as texture pixels
(bright color label), and all other pixels will be labeled as non-texture pixels (dark color label).
The threshold bounds must be decimal values between 0 and 1.
3) Move the "Texture Bands" slider to one of the three possible positions (See SLIDER section below).
The value of the slider bar is used for assigning the final label in the case
of multi-band images since extreme densities are computed per band and have to be combined.
4) Press the "AssignLabels" button to compute results.
5) Optional: Select which resulting images to display using the three checkboxes
(See CHECKBOXES section below),
then press the "Show" button to display the chosen results.
6) Optional: Press the "Save" button to save resulting images to individual files.
TEXT FIELDS
Kernel-Row:
Enter the vertical dimension of a filter kernel.
It must be a positive integer.
Kernel-Col:
Enter the horizontal dimension of a filter kernel.
It must be a positive integer.
Lower Threshold:
Enter the lower threshold for the calculated extrema densities.
Lower threshold must be less than or equal to upper threshold and within the range of [0,1].
When a pixel sample has extrema density between lower and upper thresholds inclusive,
then it is a labeled as a texture pixel, otherwise it is labeled as a non-texture pixel.
Upper Threshold:
Enter the upper threshold for the calculated extrema densities.
Upper threshold must be greater than or equal to lower threshold.
It must be a decimal value between 0 and 1 inclusive.
When a pixel sample has extrema density between lower and upper thresholds inclusive, then it is a texture pixel sample, otherwise it is a non-texture pixel sample.
CHECKBOXES
Extrema Density:
Image of extrema densities.
The extrema density of a pixel represents the number of extrema per kernel size, found within the kernel centered at this pixel.
Extrema density values range between 0 (no extrema) and 1 (all extrema). Extrema are computed independently for each band,
therefore the extrema density image has the same number of bands as the input image.
Texture Mask:
Binary single-band image where each pixel is 1 if its corresponding pixel in the input image is texture, and 0 if it is non-texture.
Segmented Image:
Original image overlayed with texture mask.
Non-texture pixels are blacked out, and texture pixels are same as in input image.
SLIDER
Texture Bands:
This slider is used in multi-band images, because each band is scanned for extrema density independently of the other bands.
The position of the slider affects how a pixel is classified to be a texture pixel.
This depends on the amount of a pixel's samples classified to be texture.
One:
If at least one sample in a pixel is a texture sample then the whole pixel is a texture pixel.
Most:
If at least half of the samples in a pixel are texture samples then the whole pixel is a texture pixel.
All:
If all samples in a pixel are texture samples then the whole pixel is a texture pixel.
BUTTONS
AssignLabels:
Performs the required calculations on the input image and creates 3 images from it, but does not show them.
Show:
Shows the images the images created with "AssignLabels" and selected in the 3 checkboxes above this button.
Save:
Opens a save file dialog box for each of the 3 images created with the "AssignLabels" or "Show" buttons.
You can then save each image to a different file, or press cancel to not save a given image.
Done:
Closes the IsTexture dialog box, as well as all images opened with the "Show" button.
NOTE
Pressing "AssignLabels" will not display the images but they are computed and can be saved with "Save".
Always press the "AssignLabels" button after loading a new image.
Pressing "Show" without "AssignLabels" will give results based on old input image.
If the input image is unchanged, and only the parameters in the textboxes, or the slider position have changed then pressing "AssignLabels" is not necessary.
Make sure to press "AssignLabels" or "Show" before using "Save".
author Martin Urban
version 1.0